Table of Contents
Uploading Documents and Creating Reusable Templates FAQs
How to upload a document?
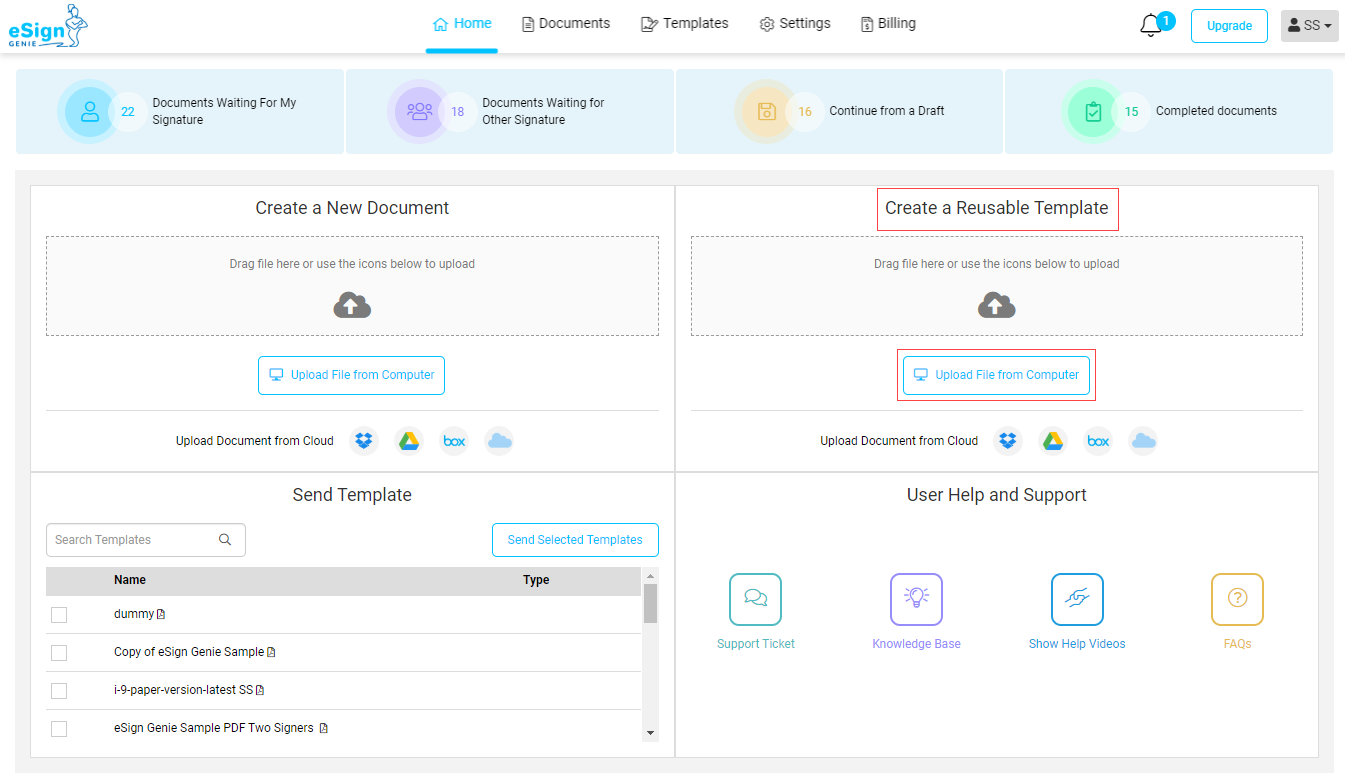
After logging into the application, you can upload a file from your computer by clicking on the ‘Upload a File’ under the ‘Create a New’ ‘Document’ section.
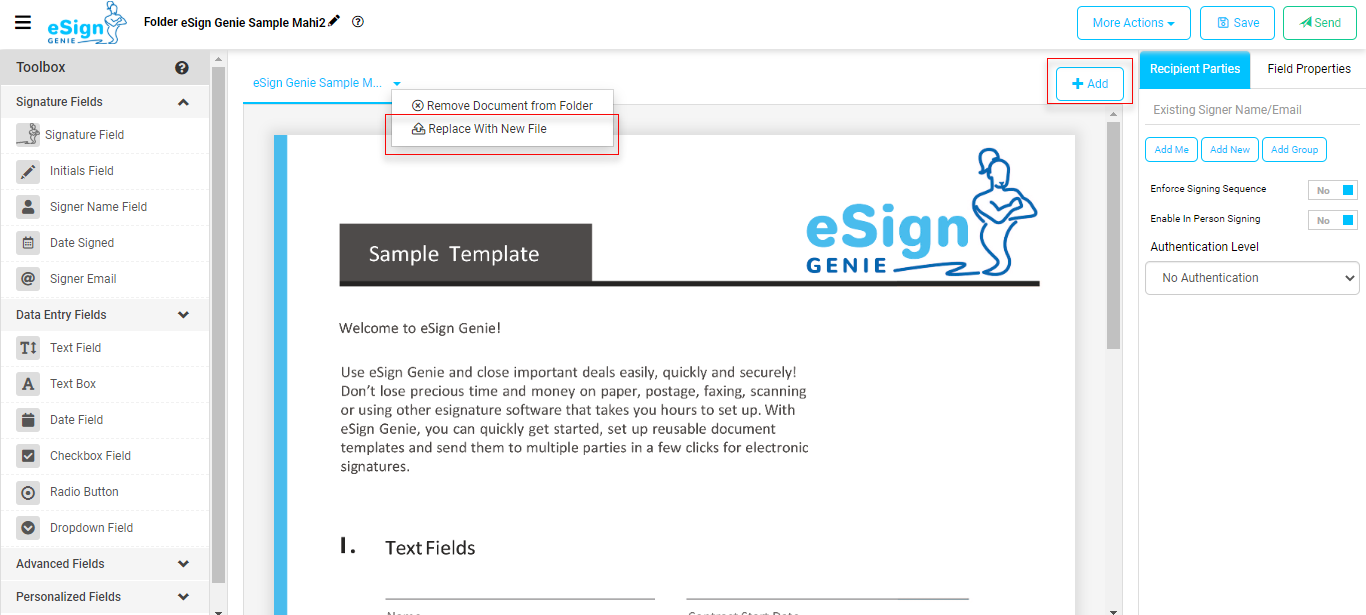
You can upload PDF file or drag and drop it also. You can add more PDF documents to this folder using the ‘add’ tab. Click on the field to select and enter its properties.
How to update documents while keeping the fillable fields intact?
In draft mode, the author/sender can simply upload and replace the existing document with an updated/new document PDF without disturbing the location of the fillable and signature fields. All the fields of the old document will maintain the exact position in the updated document.
To replace the existing document, select the document you would like to update and click on the drop down icon and select “Replace With New File” on the document name tab and simply upload a new PDF file from directory.
How to create an Foxit eSign reusable template?
After logging into the application, you can upload a file from your computer by clicking on the ‘Upload a File’ under the ‘Create a New’ ‘Reusable Template’ section.
You can upload a PDF file and also drag and drop it in. You can add more PDF documents to this folder using the ‘add’ tab. Click on the field to select and enter its properties.
How to update template while keeping the fillable fields intact?
Template author/sender can simply upload and replace the existing document with an updated/new template PDF without disturbing the location of the fillable and signature fields. All the fields of the old template will maintain the exact position in the updated document.
To replace the existing document, open the template you would like to update and click on the drop-down more Actions’ drop-down icon on the top right corner and select “Upload a New File” on the document name tab and simply upload a new PDF file from the directory.
What do I do after uploading the document/template?
Add Recipients:
After uploading the document, add the recipients from ‘Recipient Parties’ section on the top right corner of the document edit section. This will depend on how many and who will view, edit or sign the document.
In case of document, you add the ‘First Name’, ‘Last Name’ and ‘Email Id’ of all the recipients by clicking ‘Add New’.
In case you have sent a document to a recipient from your account, he/she will already be in your address book and you can simply select their name from the drop down box when put your cursor on the field. Simply start typing to auto-filter the name and select from the options.
If you are a bulk subscriber, you can select ‘Add Email Group’. To add yourself, simply click on ‘Add Me’ button.
After adding each recipient, edit privilege/action for each recipient by selecting one of the following options: ‘Fill Out Fields and Sign’, ‘Fill Out Fields Only’, ‘Sign Only’ or ‘View Only’.
In case of reusable template, you can only add generic parties from the ‘Recipient Parties’ section. You can assign them to specific users and assign privileges while sending the template for signing. Please see this in the later part of FAQs.
How to add fields and assign fields to the recipients?
After uploading the document or reusable template, select the tags from the left side toolbar and drag and drop to place them where you want the sender or the recipient to fill out the information.
You can adjust the height and width by dragging the tip at the bottom right corner of the field tag. Click on each field and update the ‘Field Properties’ section on the bottom right corner.
‘Field Name’ is useful for Excel reporting and API usage, ‘Field description’ is for providing the recipients/signers a hint on what values can be filled, date format can be selected in case of date field and select Mandatory or not check box.
You MUST assign a recipient party to each field. You can select multiple fields holding down the control key and assigned to one party.
Once all the fields are placed and assigned to the recipient parties, you can either save the document/template by selecting from the ‘More Actions’ drop down on the top right or send the document or template for esignatures. Reusable templates will automatically get saved when you click on the send button.
How to create documents from templates and send them for esignatures?
Select one or more templates from the home page or from the templates page and click on the ‘send’ button. Send Template message box will appear.
You can arrange the order or the templates if there are more than one template selected. You can select the ‘Enforce Sequence Dependency’ check box if you want recipients to receive document and perform their action in a sequential manner.
Assigning names to the recipient parties: If you have the party in your address book, you can simply select it when you put the cursor on the email field. The list will auto-filter when you start typing the name of the person in the recipient party.
Alternatively, you can select the ‘add me’ or ‘add new’ button. For all esignatures, select an email list. Also, select the action required by each party from one of the following options: ‘Fill Out Fields and Sign’, ‘Fill Out Fields Only’, ‘Sign Only’ or ‘View Only’.
Please note that if the person is assigned ‘Fill Fields and Sign’, he/she MUST be assigned a signature field to their name.
You can add additional parties to view the document by adding their name in additional parties and assigning an action.
Email Template: If you have created notification templates and made one of them as default, your default email template will appear displaying the email subject and body that the recipient parties/signers will see.
You can select an alternate email template from the drop-down or change the language of the template before sending it. If you have not created your own email notification template, you can just edit the Foxit eSign default email notification language before sending it.
Send the document to the parties immediately by pressing the ‘send now’ button. If you want to review and pre-fill some of the values, click on ‘continue’.
Enter the values of the fields that need to be pre-filled before sending the template. You can pre-fill the values of the fields on behalf of the other parties, however if the field is assigned to other parties, he/she will be able to edit pre-filled information as required.
Click on the ‘send’ button when ready. You will be directly taken to the review page where you can press ‘review documents’ and get back to signed document immediately. Recipient parties will receive notification email with link to the document to esign.
You can cancel the step to undo your work or ‘Save and Close’ to save and send the document created from the template later. Documents to be sent later get saved under draft status and can be sent from the home page by clicking on ‘Continue from a Draft’ under the ‘Status’ section.
How to I set a default date format for my account documents and templates?
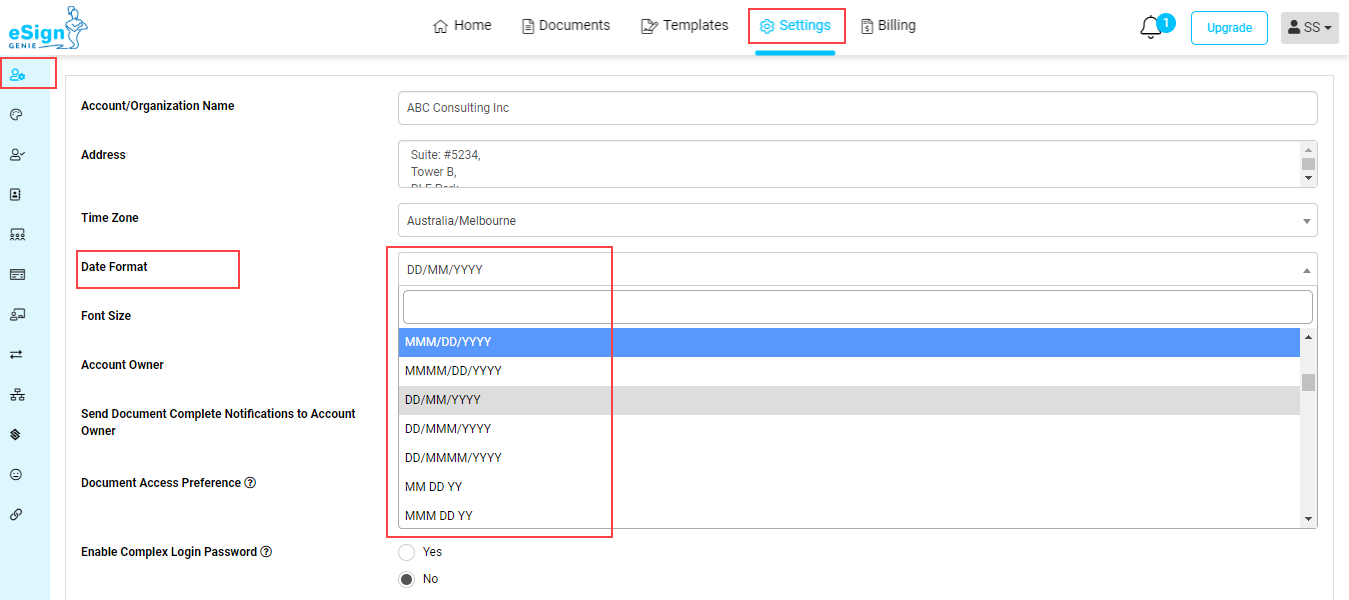
The default date format can be selected under Settings> Account Settings page. The date format you select under settings will default to any fields you add on the document or templates.
You can select an alternate format other than default date format for specific documents or templates differently.
How to enable/disable login for the recipient/signer?
The default mode for all customers will not require a login to access the contract anymore. The signer will be able to click the link in the email and directly open the document to be signed. Under Settings> Account Settings page, you will see ‘Document Access Preference’ where you can select the level of security for your signer.
If you still want the signer to login before having access to the document, just select ‘Login Required by Signer’. It is up to you to control the level of security you prefer for your esignature process.
This feature ensures that your contract simply cannot be accessed by an unauthorized signer if the original signer has already set the password on the Foxit eSign application.
How to print documents during and after the esignature process
You can download the PDF copy of the document anytime from the document page or from document view page that can be printed. Download icon is located on the document page on each document line under folder details. When you open the document, download PDF is under the ‘More Actions’ menu on the top right corner.
I am not able to delete my templates, what shall I do?
If you are trying to delete the templates, please note two points:
-
Make sure you are not using that template in your online form. Firstly you need to delete the online form from the list then it will allow you remove the template.
-
The template must not be shared with other users. Kindly remove the template from the template library.
Can I extract all the documents list?
Yes, you can download all the documents list in the excel. The option will be available under the “All Documents” tab. And it will download the excel with all the folder details. The excel will have Folder Name, Author Name, Documents, Sent Date, Folder Status, Last Activity, Signers and Signature Status.


