Summary
We value your feedback, if you have something to share then email us at support@esigngenie.com.
NEW FEATURES
[NEW] PASSWORD EXPIRATION FEATURE
You can now set an automatic password expiration for your users. Manageable and easily controlled security is a primary feature we provide to our users. Changing your password on a regular basis is the best way to secure your account and lower the chances of others having access to your account. This update allows Foxit eSign admins and Super Admins the functionality of setting an automatic password expiration for the users of their account.
To be on the safe side, Foxit eSign recommends that you change your password every few months. The automatic expiration can be selected from 60, 90, 120, 150 days, or never. If this feature is enabled on the Foxit eSign account, you will be prompted to change your password when it is about to expire. The new password cannot be the same as your old password.
You can find this new feature under the Settings tab, and then by clicking on Security.
[NEW] TEMPLATE USE CASE
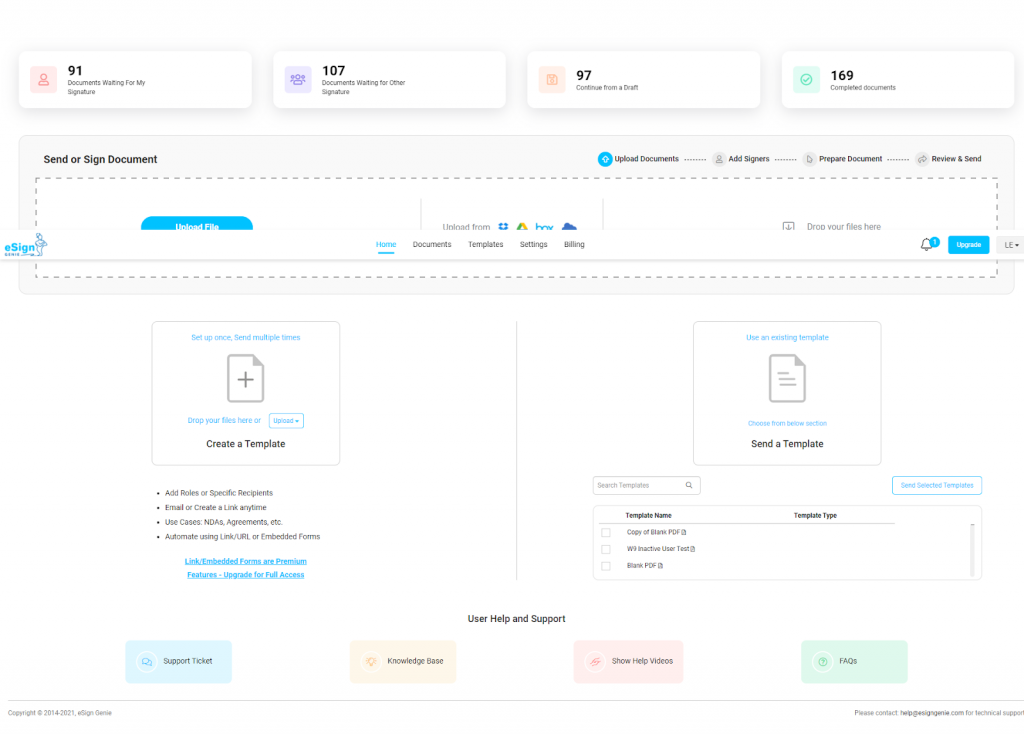
- We have added a description of Templates in the Home tab to better define the use of templates for our users.
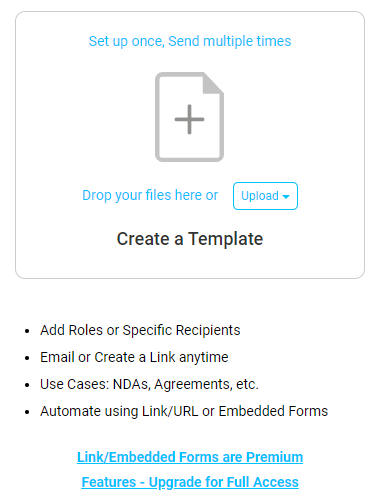
Set up once, send multiple times
the difference between a document and a template is that templates are used to quickly send documents that you use repeatedly. The form typically stays the same and the only things that changes are the data collected and the signatures. Once your PDF form is turned into a template and all fields and parties are added, you can quickly and easily send documents from the template without having to add fields each time.
Automate using Link/URL or Embedded Forms
With templates you can create a hyperlink or embedded iframe for your website or application. This is a Business Premium and Enterprise feature called Online Forms.
[NEW] GUIDED DOCUMENT PROCESS
The Guided document process is automatically available for our new users when uploading a document. If you would like to enable this feature for your account, follow the instructions below.
- Go to the Settings tab.
- Go to Sending/Signing.
- At Enable Document Step-by-Step Navigation, select Yes.
- Click Save.
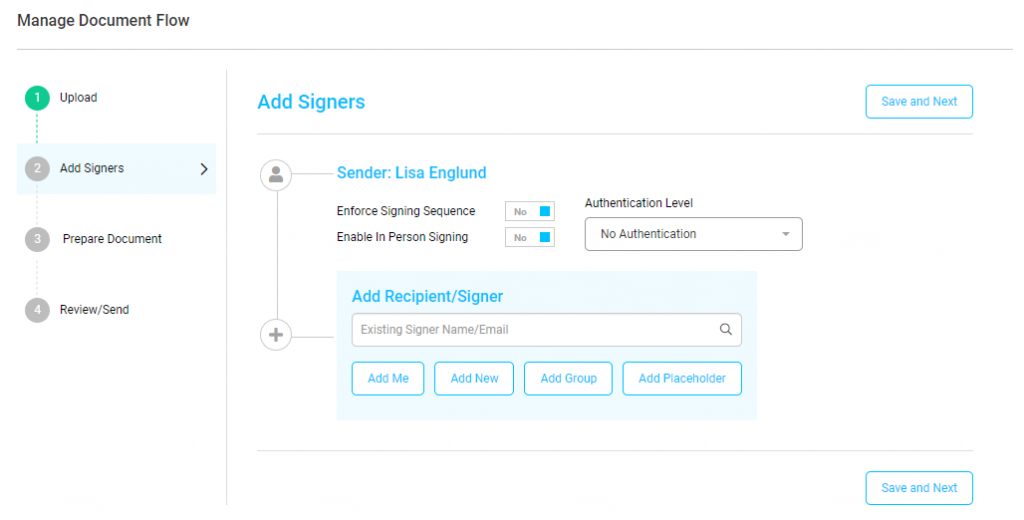
Step 2 - Add Signers
The sender can add recipients and the recipients authentication level. If you have multiple recipients and want them to sign in order, you have the option to enable the Enforce Signing Sequence feature. If the recipients signs documents electronically in-person or do not have access to an email, we can Enable In-Person Signing.
Step 4 - Review and send
In the review step, you can select the generic email template (the notification email to your recipients) or you can select one of your own email templates from the drop-down list.
The Editor View allows the sender to customize the email template for a one time use. To preview the email template, select Normal View.
When your review is finished – click Send to send your document!
[NEW] CREATION PAGE UPDATE
In the creation page, we have made a few visual changes to make it easier for you to manage the fields and easily see what recipient is responsible for which field.
The toolbox is now divided into several boxes for an improved visual layout.
[NEW] Drop-down list for the Responsible Party
- Above the Toolbox we have now added a drop-down list of all added recipients. When adding fields you need to tell our software who is going to be responsible for the fields you are adding.
- With this new update, we have added another way of selecting the responsible party for the fields in the toolbox. All recipients are added to the drop-down list and can be selected as the responsible party. The fields in the toolbox will reflect the responsible party’s assigned color.
[NEW] Selected Field marker change
We have changed the way the selected field looks for a better visual design. A selected field will have an outline with squares in 3 corners and a black arrow in the bottom right corner. All fields, when selected, will have a blue outliner except for mandatory fields, which will have a red outline.
BUG FIXES
[NEW] ONLINE FORM UPDATE
The online form had an issue with passing data via URL. While passing the data through a URL parameter to an Online Form, it caused an issue when the name contained a special character. In this case, the problematic special character was ” ‘ “.
We can use the encoded URL text for the recipient’s name in the Online form URL to be automatically populated in the Preview Window in the Online Form. Foxit eSign allows special characters in the recipient’s names, however, some of the special characters need to be encoded first.
For example, when encoding the character “ ‘ “, the correct way to display it in the Online Form URL is “ %27 “. The result was that the preview window in the Online Form was not reflecting the name correctly. This issue has now been resolved and the names are correctly presented on the Online Form.
Example:
https://www.esigngenie.com/esign/onlineforms/fillOnlineForm?encformnumber=5qVZTZZYohpepZWiOiMTtQ%3D%3D&type=link&signerFirstName=%27Lisa&signerLastName=Test&signerEmailId=lenglund@esigngenie.com


